Revegetation in the Hinterland & Coastal Areas
The idea behind a revegetation is to re-establish a section of bushland to connect or to create an ecosystem. A major requirement for a revegetation is to help prevent soil erosion and to stabilise areas. With erosion issues we are trying to prevent the loss of soil/sand and to slow down the water flow. An ideal plant for this is Lomandra longifloia for coastal areas and Lomandra hystrix for hinterland locations. The Lomandra act as a mat under the soil surface and can with- stand fast flowing water, while planting out the mid-storey and canopy slightly up the embankment.
Before starting a revegetation you have to consider the costs and maintenance: a revegetation is a long term prospect. The ultimate goal of a revegetation is to create a canopy to suppress the weeds and provide stability of the soil. The main key to a revegetation is the maintenance. Depending on the soil type, weather and correct planting/maintenance, it can take 3-5 years to create an intact canopy. Over this time you will have to maintain the revegetation and surrounding areas.
The plants that should be selected for the revegetation should be fast growing to develop a canopy and greatly reducing money and time on the maintenance. We can infill the revegetation with slower growing species after 8-12 months. It is important to plant the species that are suited to the ecosystem. There a number of avenues to help with your plant selection. Firstly from the knowledge of on ground works, websites with the regional ecosystems and advice from a native tube stock specialist. If you are planting in a frost environment, there are plants suitable for this area.


Our method of approach to prepare the site for planting will take four weeks.
Step 1:
Firstly walk through your proposed revegetation and flag any natural recruitment and hand weed native ground covers to encourage this to spread. This will help you in the long run, preventing the growth of weeds. Then walk along the interface of the good bush, this is the line where the existing canopy is meeting your revegetation. There will be a large seed bank in the soil in this location. So the aim here is to encourage the growth and this is where you will find native ground covers, such as rainforest grass species.
Step 2:
We then brush cut the area if required. Our aim is not taking out all the grasses and annuals. If there are woody weeds such as Camphor laurels and privet, it would be best to take these out at this stage. Leaving a few to help with your canopy, depending on how degraded the site. More often than not there would be Wild tobacco in the degraded area. These weeds are great to use in your revegetation as they assist with developing canopy in your revegetation. Be mindful to not let them overgrow your revegetation and remove once the native tube stock has begun to create a solid canopy.
Step 3:
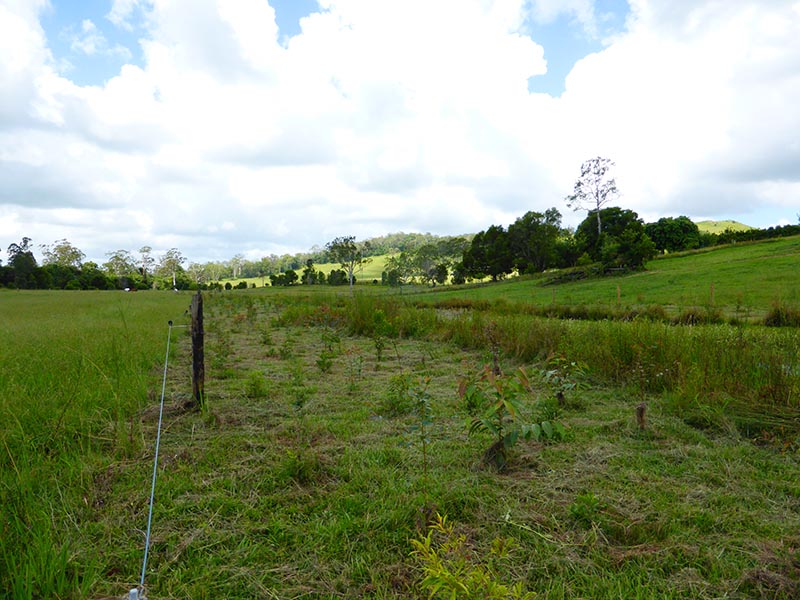
After a couple of weeks, the weeds will have grown enough for you to spray. On a fine day we then spray circles where we wish to plant. The normal spacing for planting is 1.5 – 2m, in a staggered approach; try not to plant in rows. The reason for not spraying out the entire revegetation is to help with the stabilisation of the ground. If you spray out all the weeds you will increase the temperature of the area over the summer months at ground level, inhibiting the growth of the plants and any natural regeneration. There will also be erosion issues if all the groundcovers are removed.
Step 4:
Once the grass/annuals have died off, we are now ready to plant. Keep an eye on the weather reports and plant when you are sure that there is rain or showers coming for the next few days. This will help with the establishment and reduce stress of the plants. If no showers come, you will be required to water. Before planting sit the plants in water with organic solution over the tube height until all the air bubbles have escaped. This insures that the entire plant it watered in the tube and will help prevent the stress of the native tube stock. If required place fertilizer in hole and cover with a little layer of soil as to prevent root burn. The plant is to be removed from tube as to not damage its root base and then the surrounding soil firmly compacted by hand to ensure roots contact soil and air pockets removed. Using natural leaf litter as mulch helps with water retention also.
We then water in the native tube stock. If required install plant guards, jute mat and stakes.
Step 5:
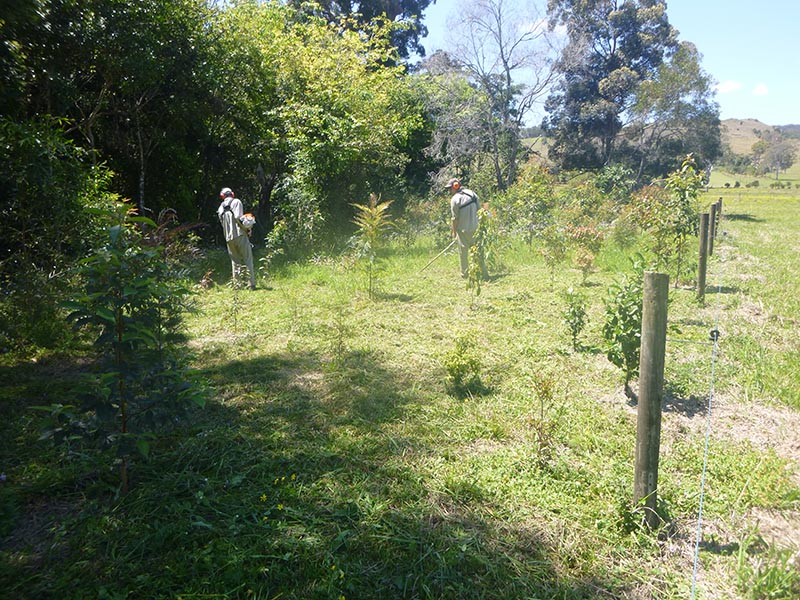
This is where we start on the maintenance of the site over many years, until the canopy is starting to supress the weeds. We continue to spray rings around the plants. Any weeds growing around the native tube stock is competing with it for the valuable nutrients and water, thus inhibiting its growth. Grass is the biggest inhibiter for the native tube stock. During the maintenance visits we brush cut all the weeds located between the native tube stocks. We keep the weeds between the tube stock to help with to lower temperature, soil erosion and assisting with mitigating flood and frost damage. During winter in high frost areas we generally leave the grass and annuals around the height of the plantings to protect them from frosts, in the first year of the revegetation. We have also noticed that when the weeds are kept at the same height of the plantings they have an increased survival percentage. Whilst brush cutting we monitor the site for any possible native recruitment. Once areas are found with native recruitment, we endeavour to hand weed these areas.
Step 6:
After 8-12 months inspect the revegetation for any loss of plants, if they are any losses there should be an allocation to replace these vacant areas with new native tube stock. At this time you can now plant slower growing plants, as there should be the beginning of the small canopy developing.
Step 7:
Continue with the maintenance of the revegetation. Spraying rings around the plants and brush cutting. It could be time to thin out some of the woody weeds if their located in the revegetation site. Inspect the ground for any natural recruitment through the entire process and hand weed to encourage growth.
Step 8:
Once the plants have been in the ground for a couple of years you can start to reduce the number of maintenance visits to the revegetation site. Keep an eye on any exotic vines that can smoother the trees. At this stage the revegetation will have a good canopy structure.
Step 1:
Firstly walk through your proposed revegetation and flag any natural recruitment and hand weed native ground covers to encourage this to spread. This will help you in the long run, preventing the growth of weeds. Then walk along the interface of the good bush, this is the line were the existing canopy is meeting your revegetation. There will be a large seed bank in the soil in this location. So the aim here is to encourage the growth and this is where you will find native ground covers, such as rainforest grass species.
Step 2:
We then brush cut the area if required. Our aim here is not taking out all the grasses and annuals. If there are woody weeds such as Broad-leafed peppers or Easter cassia, it would be best to take these out at this stage. Leaving a few to help you with canopy, depending on how degraded the site.
Step 3:
After a couple of weeks, the weeds will have grown enough for you to spray. On a fine day we then spray circles where we wish to plant. The normal spacing for planting is 1 -2m, in a staggered approach; try not to plant in rows. The reason for not spraying out the entire revegetation is to help with the stabilisation of the ground. If you spray out all the weeds you will increase the temperature of the area over the summer months at ground level. Thus inhibiting the growth of the plants and any natural regeneration. There will also be erosion issues if all the groundcovers are removed.
Step 4:
Once the grass/annuals have died off, we are now ready to plant. Dependant on the site we may have to treat the area with a wetting agent. Keep an eye on the weather reports and plant when you are sure that there is rain or showers coming for the next few days. This will help with the establishment and reduce stress on the plants. If no showers come, you will be required to water. Before planting sit the plants in water with organic solution over the tube height until all the air bubbles have escaped. This insures that the entire plant it watered in the tube and will help prevent the stress of the native tube stock. On selected sites add some organic compost to be pre dug into hole and mixed in water crystals soaked in an organic fertilizer solution. The plant is to be removed from tube as to not damage its root base and then the surrounding soil firmly compacted by hand to ensure roots contact the soil and air pockets are removed and apply natural leaf litter as mulch. We then water-in the native tube stock. If required install plant guards, jute mat and stakes.
Step 5:
This is where we start on the maintenance of the site over many years, until the canopy or ground covers are starting to supress the weeds. We continue to spray rings around the plants. Any weeds growing around the native tube stock is competing with it for the valuable nutrients and water, thus inhibiting its growth. Grass is the biggest inhibiter for the native tube stock. During the maintenance visits we brush cut all the weeds located between the native tube stocks if required. We keep the weeds between the tube stock to help with the lower temperature and soil erosion. Whilst brush cutting or hand removing weeds we monitor the site for any possible native recruitment. Once areas are found with native recruitment, we endeavour to hand weed these areas.
Step 6:
After 8-12 months inspect the revegetation for any loss of plants. If they are any losses there will be an allocation to replace these vacant areas with new native tube stock. At this time you can now plant slower growing plants, as there should be the beginning of the small canopy developing or ground covers interlocking.
Step 7:
Continue with the maintenance of the revegetation. Spraying rings around the plants and brush cutting. It could be time to thin out or remove the woody weeds on the revegetation site. Inspect the ground for any natural recruitment through the entire process and hand weed to encourage growth.
Step 8:
Once the plants have been in the ground for a couple of years you can start to reduce the number of maintenance visits to the revegetation site. Keep an eye on any exotic vines that can smoother the trees. At this stage the revegetation will have a good canopy structure or good ground coverage.
Now it’s time for you and local wildlife to enjoy the habitat you have created!